KittenTTS is a neat open-source
text-to-speech model that packs a surprising amount of punch in sizes as low as 25 MB. It
has over 11,000 stars on GitHub and for good reason — the output quality
is impressive for something you can run locally. The catch? It's Python-only,
needs pip install gymnastics, and you certainly can't just hand someone a link
and have them try it out.
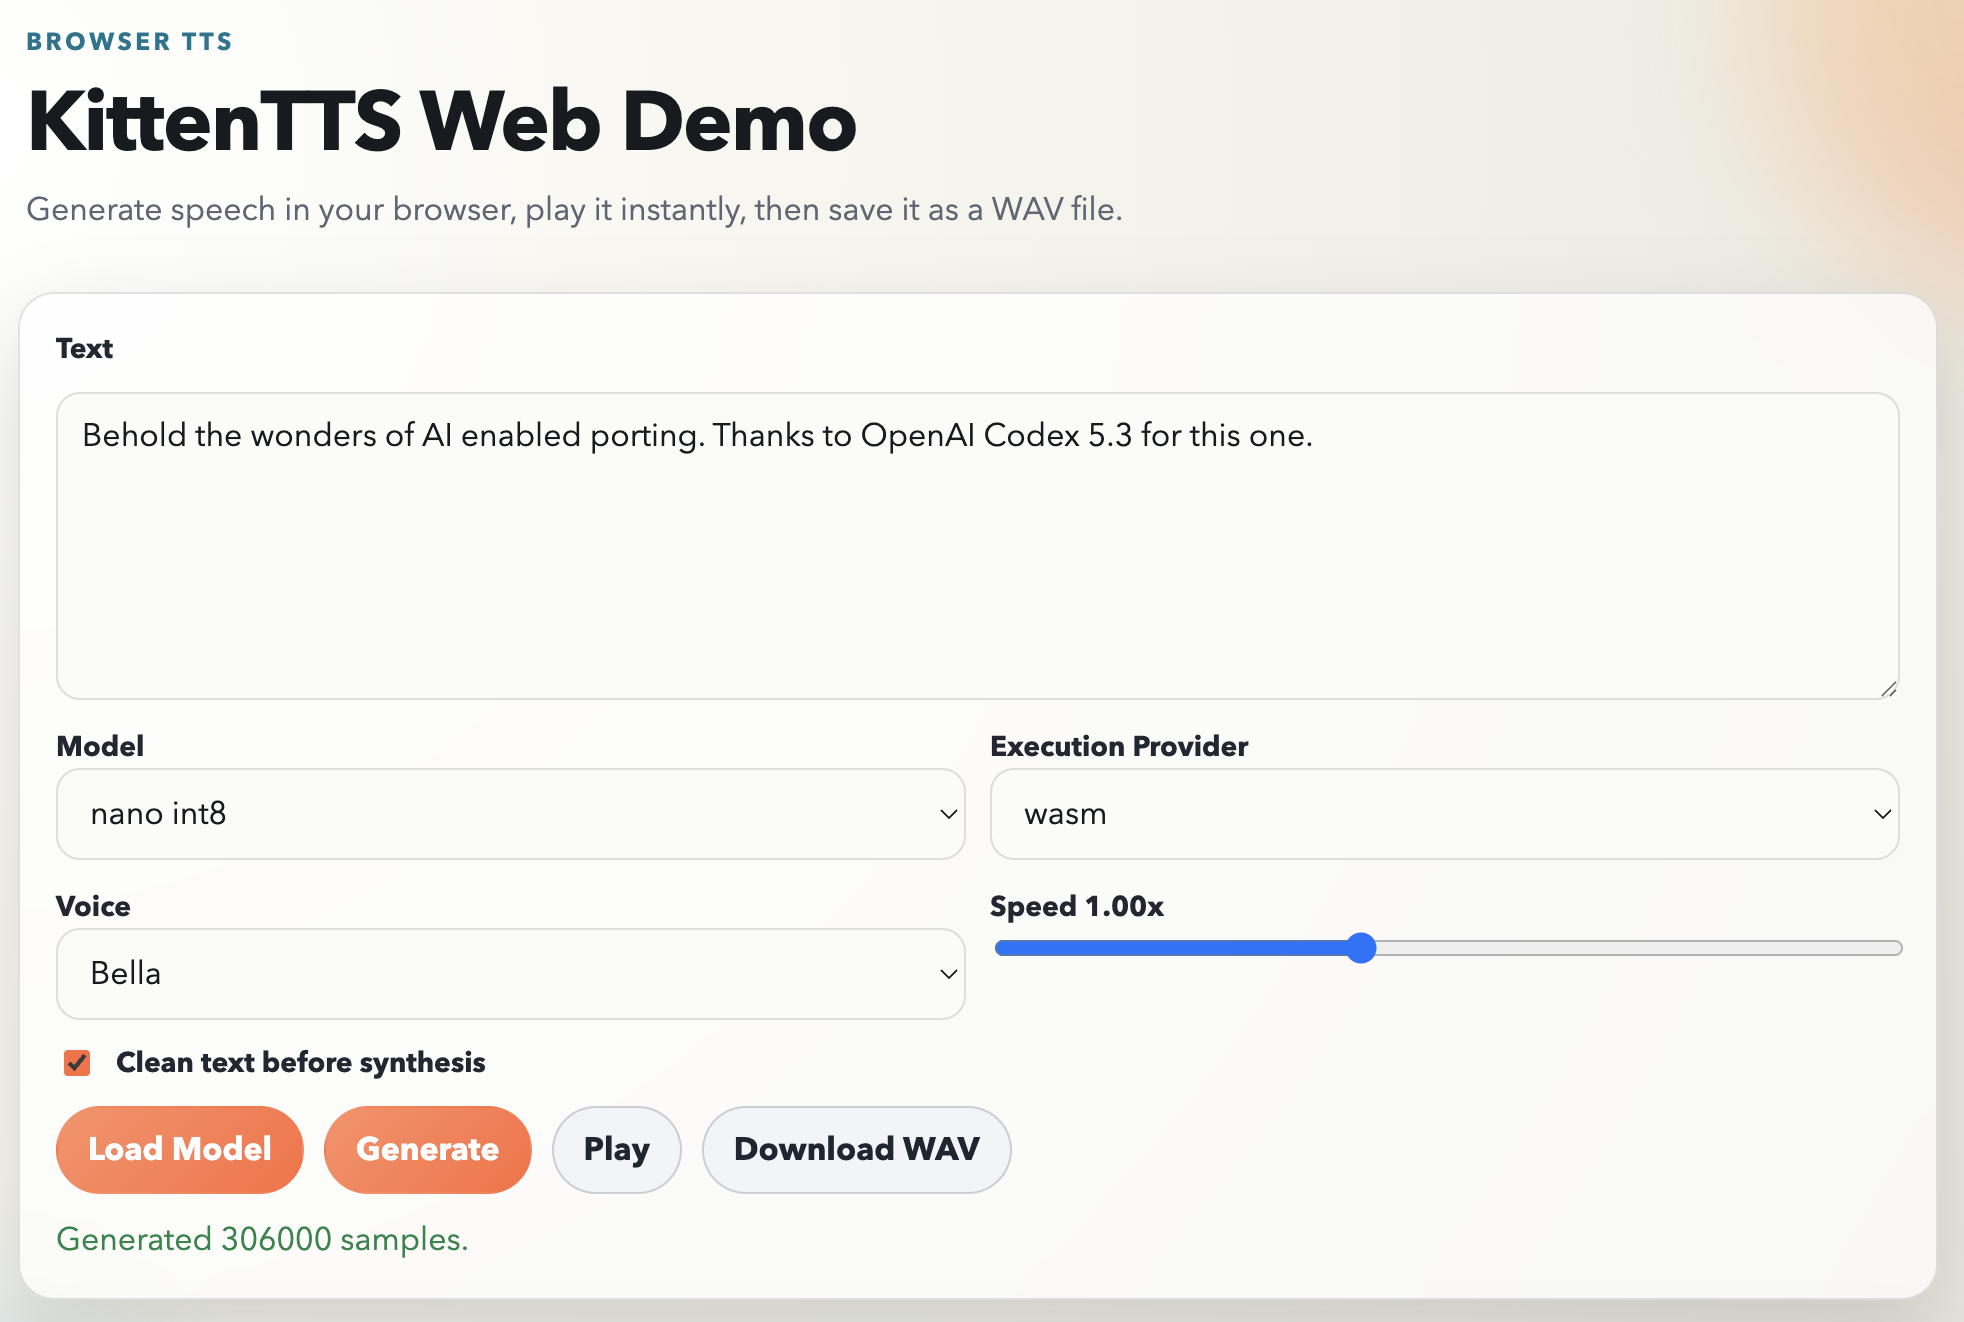
The KittenTTS folks say they have browser version planned, but I was a bit impatient and also was eager to find out if a modern AI agent like Codex could pull off a Javascript port. The plan was simple: you open a page, pick a voice, type some text, and hear it speak. No server, no Python, no installs, available to client side web projects easily.
Spoiler alert: It actually worked almost single shot (I had to prompt my way through the plan and run a bunch of pnpm install commands to work around the sandbox basically). The results are up in https://github.com/jokkebk/KittenTTS-JS, but read on to find out how I got there with ChatGPT Codex 5.3 doing the heavy lifting.
The Plan
I started by asking Codex how hard it would be to create a browser JS port.
It studied the Python codebase, identified the pipeline stages, and came back
with a surprisingly thorough analysis. The core pipeline is:
Text preprocessing (cleanup, sentence chunking)
Phonemization via eSpeak
Token mapping (phonemes to integer IDs)
ONNX model inference per chunk
Waveform concatenation
The model itself is a single ONNX graph that takes tokenized phonemes, a voice
style vector, and a speed parameter, and outputs raw audio samples directly.
No separate vocoder needed. This is key — it meant the browser port just
needed ONNX Runtime Web and the right input pipeline.
Codex also noted the tricky bits: voice embeddings stored in NumPy's .npz
format (basically a ZIP of .npy files), and the eSpeak phonemizer which is a
C library. Both have WebAssembly ports available, making the whole thing
feasible. It laid out a 7-phase plan with API design, repo layout, risk
mitigations, and estimated about 7–8 days for a robust V1. I had it write
the plan to PLAN.md before proceeding — having that concrete reference
turned out to be valuable.
Letting Codex Work
With the plan saved, I told it to go ahead. Here's roughly what happened over
the next few hours, based on the commit history:
Longer version (templated with Claude Sonnet using the github commit):
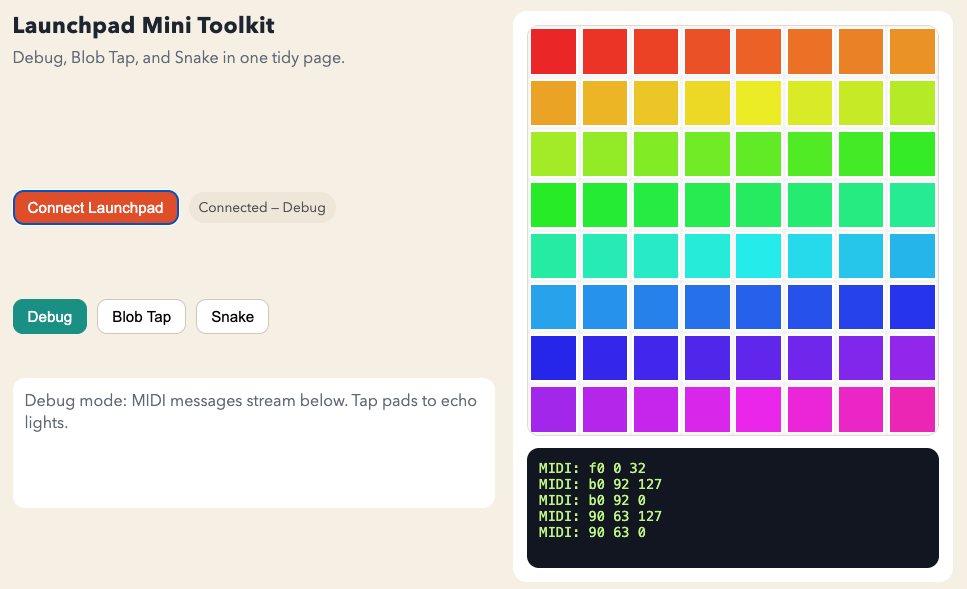
I've been thinking about getting a MIDI controller to use as a Stream Deck type
of device — not to do any music stuff, but use the midi messages to
automate workflows. Not having found anything compact, robust and with cool
twiddly knobs, I thought to beta test my actual interest by loaning a Novation
Launchpad Mk3 from a friend.
I started by asking ChatGPT if we can control this thing with MIDI and the
answer was yes. It even suggested a Python test script to try it out. I obliged
and ran it, and it didn't work, but a few rounds of discussion revealed the
culprit to be two input and output devices, and the script had defaulted on the
wrong one.
Now Chrome nowadays has all these awesome local USB capabilities, so what about
MIDI? Turns out, you can skip all Python package dependencies and just write a
single HTML page that can connect to the launchpad and program it using the Web
MIDI API!
The Launchpad Mk3 uses MIDI messages also to control the LEDs, so you can not
just receive input, but actually control the 8x8 LED matrix with 127 colors
(ChatGPT said first half is static and the other half pulsing colors, but I was
not quite sure how this worked).
Snake and Blob Games
Once I had the basic LED control working and a HTML debug console that showed
the MIDI messages flowing, I couldn't resist adding some games. Snake is the
classic — use the arrow pads to guide the snake around the 8x8 grid. The
Blob game is a variant I asked Claude Code to whip up for me, or actually my
daughter, who still lacks the dexterity to play Snake, but might be happy with
some animation if she succeeds in hitting the blob on the grid.
I've been doing some housekeeping on my website, moving various small tools and experiments that were scattered in subfolders to a proper home at tools.codeandlife.com. While at it, I used Claude Code to give most of them a UI refresh while keeping the core functionality intact.
Simple (PWA) arcade game for the Christmas holidays
Most of these are simple single-file HTML+JS apps that I've accumulated over the years. Nothing fancy, but occasionally useful. The full list is at tools.codeandlife.com.
You might have noticed things look a bit different around here. I finally got around to refreshing the blog design with the aid of Claude Code. Thanks for drafting this post also go the same way.
What's New
Dark and light mode — The site now respects your system preference. No more blinding white pages at 2 AM.
Retro-inspired styling — I went for a look that nods to the old-school web while staying readable. Monospace headers, clean lines, nothing fancy.
Search — There's now a search box in the header! Finding that one post about Arduino timers from 2014 should be much easier now. Try it out and see if Claude just hallucinated that joke!
Related posts — Single post pages now show related articles in the sidebar (desktop) and at the bottom (mobile). Hopefully this surfaces some older posts that might still be useful.
The underlying tech is still Eleventy with Liquid templates, but I did upgrade to newer version of 11ty with some AI help — Opus 4.5 did most of the work and even advised against upgrading to a fancier framework, which I appreciated greatly.
Very small cross-advertisement: I finally got around to revamp my personal website, eliminating a lot of autobiographical jabber. Such level of detail felt very needed in 1998ish when I first did my homepage and I had followed the tradition, but now we're in a more streamlined mode. Having said that, it's still pretty verbose.
Looks are now very clean, though smell AI generated (and rightly so), but it's not a heavy traffic site and most readers will miss the point, so I'll let it stand. It's not like the previous version was better, so I will take the improvement and spend twiddly-time elsewhere. :)
My first tool idea: a browser-based zip image viewer. I just updated JZipView (a native C app), and thought a pure HTML/JS version would be a nice complement.
Two AI-Generated Viewers
I had both Claude Opus 4.5 and ChatGPT 5.2 Pro create their own versions from the same basic prompt. The results:
Both needed some polishing with Claude Code (using Sonnet) to get them working similarly — handling drag-and-drop, keyboard navigation, and the usual edge cases. But the core functionality came out surprisingly well from both models.
You can drag a .zip file over, and it will use import { unzip } from 'https://esm.sh/fflate@0.8.2'; to decompress it and show a gallery view
Left click on an image opens it in "fit to view" mode
Another left click will open 1:1 mode and mouse gets captures so you can just mouse move around the image
Right click goes back to "fit to view" and again to grid mode
Arrow keys and scroll wheel allow to browse through the images