DipTrace and PCB manufacture with Olimex
Sat, Jul 7, 2012 in post Electronics diptrace drill file gerber gerber export olimex pcb pcb fabrication pcb layout tutorial
It’s time to wrap up my DipTrace tutorial series with a brief look at how to do Design Rule Check (DRC) with the PCB layout tool, and generate gerber files for board manufacture. Take a look at the previous part on how the board was done.
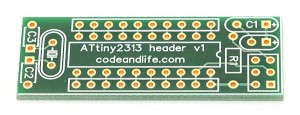
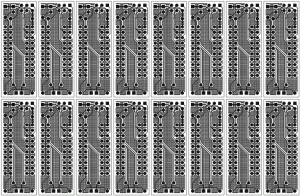
I chose Olimex PCB prototype service because it’s very inexpensive by itself: 30€ for a two-side 160x100mm euroboard plus 5.50€ for shipping. They also can panel your designs and I counted that 16 ATtiny2313 headers would fit into a single board while still leaving room to cut them apart. Read on what was needed to make sure my PCB design was ready for manufacturing!
Design Rule Check (DRC)
The first thing before ordering was to investigate Olimex requirements for the boards. I knew I had no overlapping drill holes and had taken care to use only drill sizes supported by them (35 and 39 mils), so the most important ones for me were:
- At least 8 mils spacing between tracks/pads
- At least 8 mils for pads (i.e. 16 mils larger pad than drill hole)
- Less than 20 % of area without solder mask
- Over 500 drill holes costs a bit extra
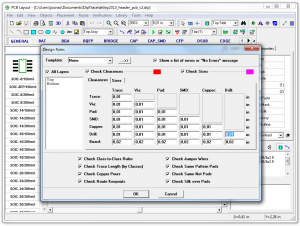
I had number two also covered in pad setup, and was quite confident that number three would be no problem either. However, the board had 58 holes each, so 16 of them would be well over 500. However, the extra charge of 3€ was not an issue. So the number one was only major concern. So I opened up the Verification > Design rules.. dialog and set all clearances to 10 mils (0,01 inches) just to be sure. See the first screen capture on right.
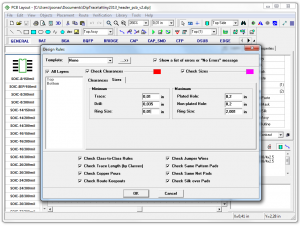
On the “Sizes” panel, I also set minimum drill size to 0,035″ and trace width to 0,01″, even though those should be in order. I then confirmed the DRC settings with “OK”.
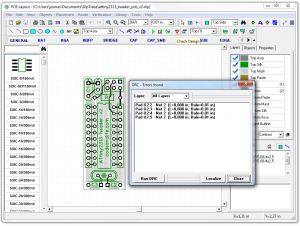
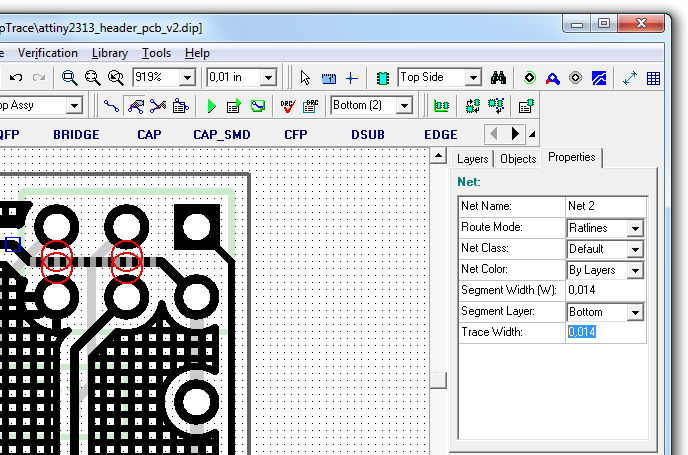
Running the design rule check with F9 revealed that the bottom layer power trace between 6-pin header was a bit too thick to fit between the pads. You can see faint red highlights in that portion of the board, and DRC gave four errors in total.
After closing the DRC dialog, I pressed “B” to get to the bottom layer and clicked on the offending trace. Decreasing the trace width to 0,014″ finally got rid of the problem – see the image below. A bit wider power trace would’ve been nice, but I guess this will do.
(the red marks in the above screen capture disappeared after pressing F9 again to recheck)
Generating Gerber files
Like most PCB fab houses, Olimex doesn’t accept DipTrace files (Eagle users are luckier in this regards, although I feel sorry for them in other fronts), so I had to generate so called “gerbers” from DipTrace. Gerber file is basically a text-based vector format. One gerber is generated per board layer, including silk and solder mask layers. DipTrace also supports generating assembly and solder paste layers, and bottom silk layer, but I only needed to generate the following:
- Top Silk
- Top Mask
- Top (signal layer)
- Bottom (signal layer)
- Bottom Mask
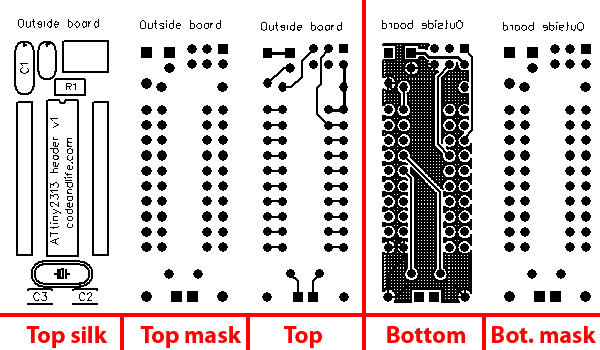
Before I was ready to generate the gerbers, one final thing needed doing. Olimex requires text on all layers of the board to help them know which way it’s supposed to be oriented, so the bottom layer for example isn’t accidentally mirrored. Furthermore, the text on bottom layers need to be mirrored. It caused me a bit headache, so here’s an illustration of the way the text should appear in gerbers:
I placed the text actually even further away than in the above illustration, as I was a bit worried that when Olimex guys would panelize two of these on top of each other, my “help text” would be overlaid on top of the other board.
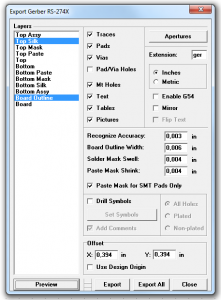
Generating Gerber files it quite straightforward, although there are dozens of options available to confuse us beginners:
- File..Export..Gerber
- Generate “Apertures” using the associated button and “Auto” button in the dialog that appears
- Select the layer you want to export from “Layers”
- Olimex also requires board outline to all layers, so control-click to select that, too
- Optionally, change the extension to “ger” (helps with GerberView)
- Use “Preview” to check everything looks OK
- Export the layer with “Export”
- Repeat for remaining layers
After exporting the layers listed above (all with board outline also selected), I then continued to export the “Board Outline” and “Board” layers separately, as Olimex requires them, too (so don’t also select “Board Outline” when exporting “Board”).
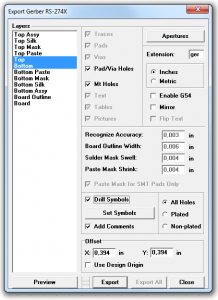
Once all normal layers are exported, check the “Drill Symbols” checkbox. This should disable some of the options, enable some others and automatically select the Top/Bottom signal layers. Check the options that you’re exporting “All Holes”, and use “Set Symbols” button and “Auto” button in the appearing dialog to automatically set drill symbols. Finally, press “Export” once more to export a drill helper file.
You can then exit the Gerber export dialog, and export one more thing, the N/C drill file (I’m not 100 % sure Olimex uses this, but it doesn’t hurt to have it). It can also be found from File..Export menu. Use the “Auto” button again to give names to different sized drill holes, and just press “Export” to save the file. All done!
Preparing everything for fabrication
After all the data has been exported, it is usually prudent to check the results with a gerber viewer program to see how the files look like. I have used GerberView and found it to be rather nice. You can add all the .ger files and even the N/C drill file to a project, and see that all the layers align nicely and look as they should.
Olimex also required a text file with the order to give shipping and billing address, contact information etc. They have a nice template file on their web pages which you can edit. I chose “smooth borders” for the panelized boards – the saw eats up a bit of the board material when compared to guillotine, but give a nicer result in return. Olimex also wanted a panelization picture in the zip file, I quickly whipped up the picture on the right to help them.
Once everything was done, I sent a zip of everything to Olimex, and the fabrication went nicely. I’ll write another post about the whole Olimex experience with more pictures of the boards that arrived. Meanwhile, you can get the DRC-updated PCB file and the Olimex zip where you can see the example of the text file I also made. The DipTrace and gerber files are licensed under a Creative Commons Attribution-NonCommercial-ShareAlike 3.0 Unported License.
PS. Note that the Olimex zip files are of newer version than my original order, and I will not guarantee that they are error-free, so if you use them for anything, do your own sanity checks before ordering!
Proceed to next part in the series: Olimex ordering experience and final boards!

4 comments
pcb design:
Thanks for such an informative article and the extensive explanation, it’s been very useful.
Kali Mani:
So gooooood!!
thanks a trilion for your knowledge.
3 days ago with diptrace and there you apeared! Sharing like this makes me belive in good, nice, smart people like you.
thanks again
Click here.:
It’s actually a nice and helpful piece of information. I am satisfied that
you just shared this useful information with us.
Please keep us up to date like this. Thanks for sharing.
Arnaqueur:
Le e-commerce : http ://www . sante-orient . fr/
tenu par fabien . utjesenovic http : //fr . viadeo .
com/fr/profile/fabien . utjesenovic est en vérité un faux e-commerce d’arnaque !
ne commandez jamais chez lui ! Je vous retouve en garde puisque j’ai
de nombreux éléments qui prouvent que ce site ou blog est celui d’un voleur ,
un chapardeur nommé Fabien !Je n’ai jaamais reçu cee que Mr Fabien Utjesenovic devait m’envoyer ,
ett cela après beaucoup de requêtes eet beaucoup de patience : l’unique
chose que j’ai reçu de sa part ce sont des mails ridicules
et vulgaires , et je n’ai jamais rien reçu de ce qu’il devait m’envoyer .Si vous ne voulez pas ruiner votre temps et votre investissements
ppour finaoement être très déçu évitez à tout prix de
commander sur ce website de charlawtans ! een réalité ce type de e-commerce devrait être fermé le plus vite possible .Merci de faire circuler cette actualité , auprès des musulmans et des autres dans l’idée d’éviter
qque d’autre personnes ne soient victimes d’arnaque comme jee l’ai personnellement été en achetant suur ce
site internet de pirate !Sachez que ce Mr Voleur de santé d’orient
ne c’est pas contenté de me voler il m’à cruellement manqué
de respect ett c’est moqué de moi , comble d’ironie , c’est le volé qu’il y a moquer par le
voleur ! encore une fois faites tourner l’info pour que cee genre de brigand du internet
soient punis ! santé d’orient arnaque santé d’orient
voleur